Update the domain of the client
Soon, the old rzg.mpg.de domain will not be available anymore and users that configured their DataShare client some time ago need to update the configuration to point to the new mpcdf.mpg.de domain.
In order to do so, the recommended procedure is to remove the old account and add a new one pointing to the server in the correct domain. This procedure, if done correctly, induces only a re-synchronization of the local data with the server, without having to download again the data currently stored on the DataShare server.
Below, we describe the steps required when using the generic ownCloud desktop client for Linux. We suggest to read each section in its entirety before following the instructions. In particular, be careful when adding the new account to not skip setting the Advanced configuration.
Please, also consider updating your desktop client to a recent version before starting the domain migration procedure.
1. Remove the old account
Open the desktop client and select your account at MPCDF in the top bar. If you have multiple accounts managed by the same client, please check that the selected account is the one you need to modify. If the line “Connected to https://datashare.mpcdf.mpg.de, then your client is already configured with the correct server and you don’t need to execute the following instructions.
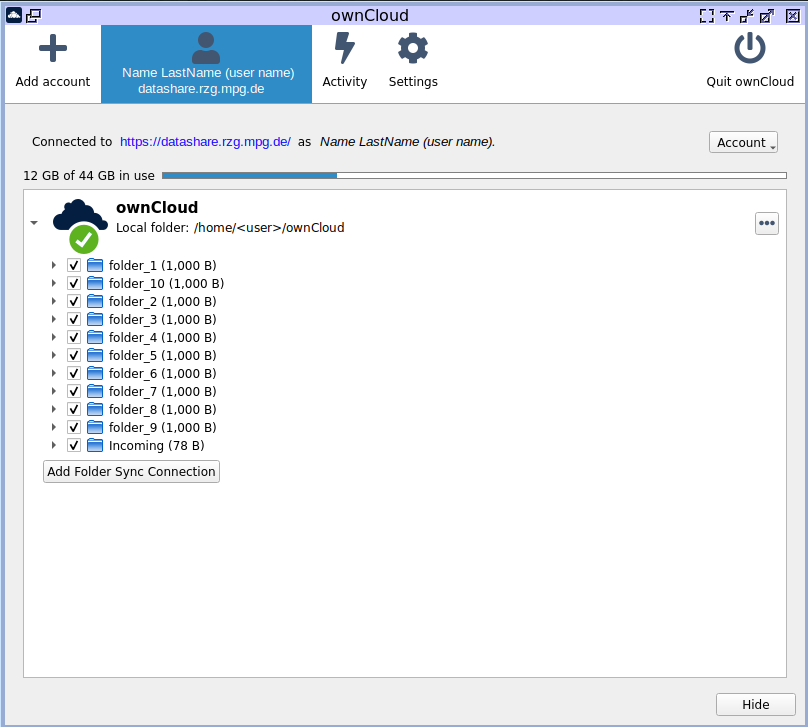
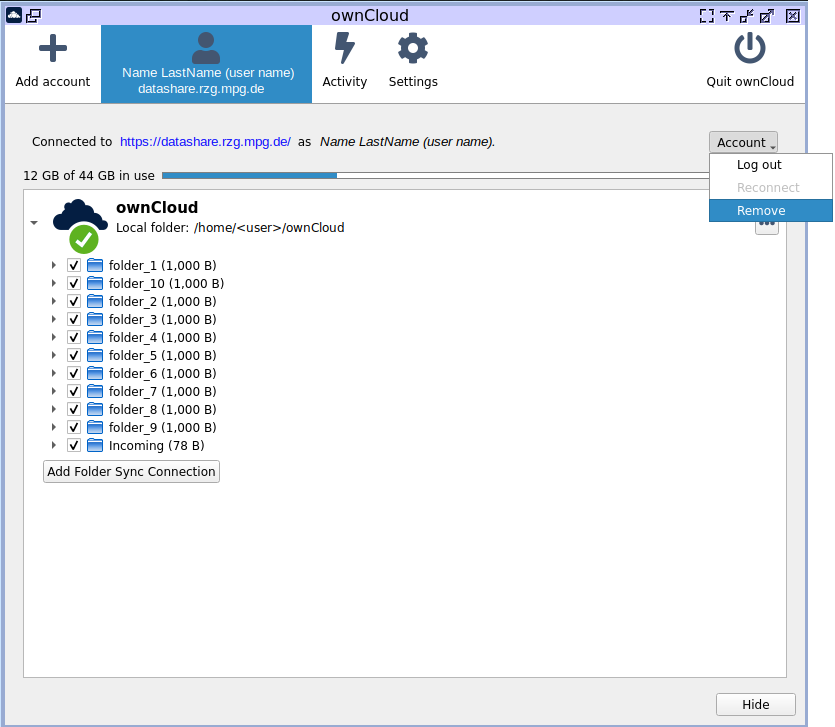
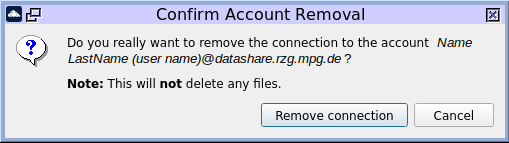
Select the Account button next to your account information. Then the option Remove from the drop-down menu. Confirm with Remove connection that you want to remove the account. As noted in the message, no data will be deleted from your local machine or from the server when you remove your account from the client.
2. Add the new account
In order to add a new account, select again the Account button and then the Add new option. If the desktop client was managing a single account, the client will automatically show the Add new account wizard.
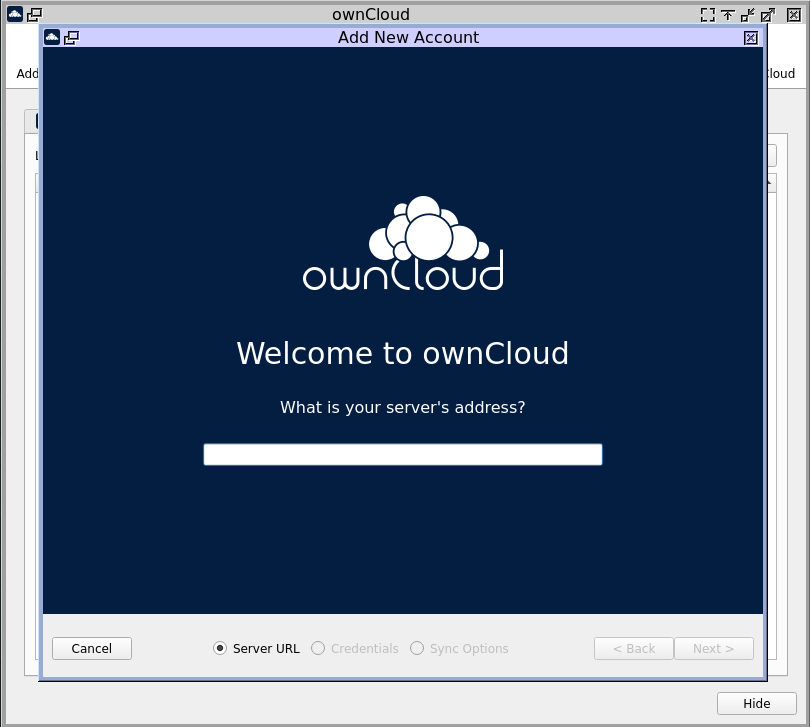
In the text bar, insert the new domain address: https://datashare.mpcdf.mpg.de, then click the Next button.
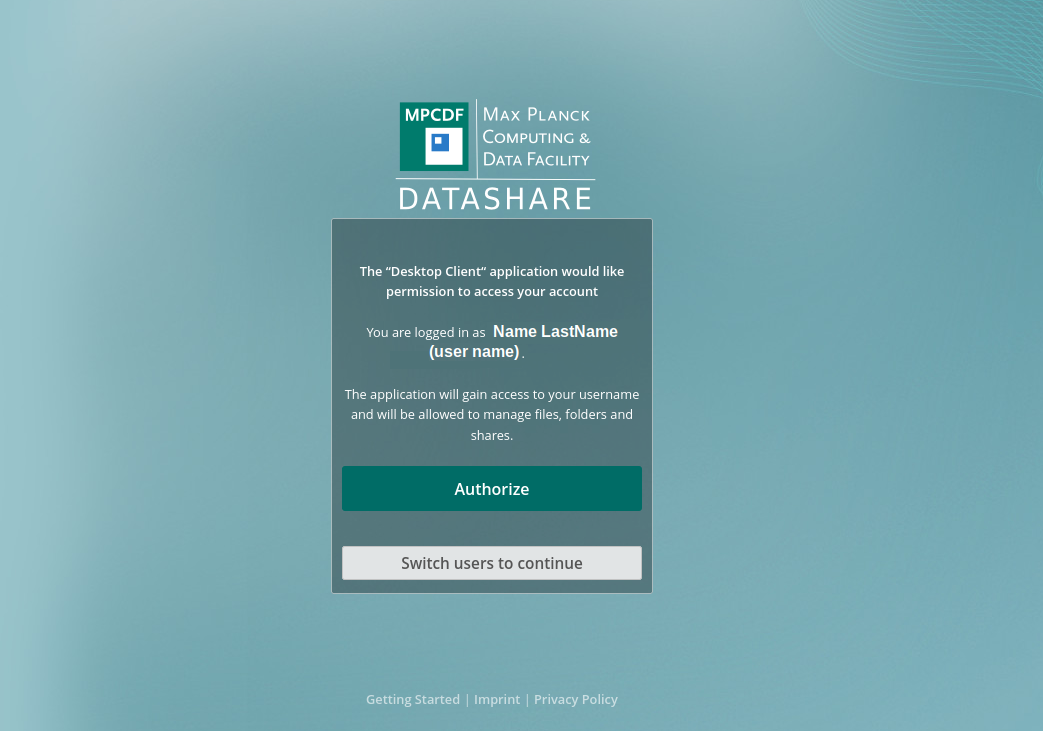
After this you will need to authenticate on the MPCDF DataShare server. Select the Open Browser button in order to be redirected to the login page on DataShare.

After logging in with your DataShare credential, select the Authorize option in order to allow the connection from your newly configured client.
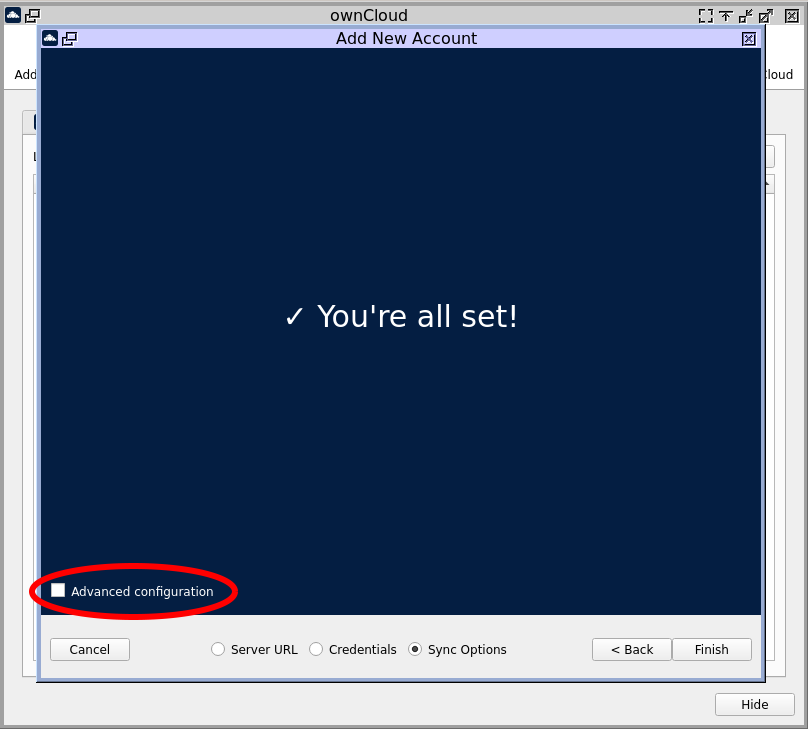
IMPORTANT: once you are see the You’re all set! message do NOT select the Finish button yet.
In order to avoid the re-download of all the data on the server, we need to configure the client to use the same folder it was using with the old account.
This can be done by selecting the Advanced configuration and setting the correct value for the Choose local download directory field. The default value /home/<user>/ownCloud can be adjusted in order to match your the local download directory. At this stage, it is also possible to change the default Download everything option to the same configuration used before. This is especially recommended if large amount of data is available on the DataShare server that does not require to be synchronized locally.
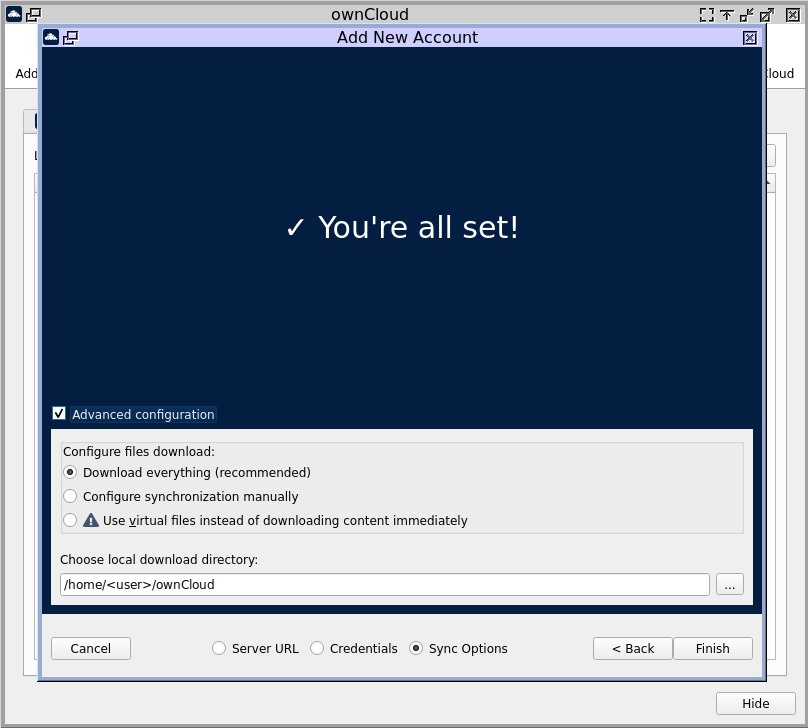
Once this is done, we can finally press the Finish button.
3. Wait until the re-synchronization of the data is completed
Depending on the amount of data you have on the DataShare server, this process can take up to several minutes. During this time the checksums of your data are calculated and compared to the one on the server, downloading only files for which a more recent version is available.
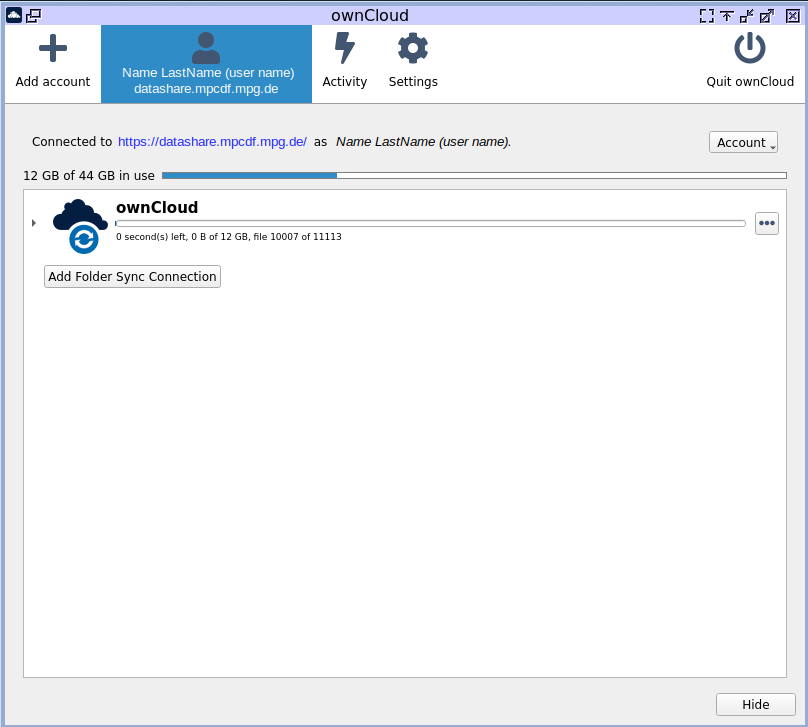
Once the re-synchronization is completed, the domain on your client has been successfully updated to the new MPCDF domain.