Poetry and GitLab: Devops for Python developers
Introduction
The MPCD GitLab instance offers a wide variety of so called Devops functionality. This includes tools for manualy project management as well as automatisation tools for code building, testing and deployment (continous integration).
Poetry is a tool for Python packaging and dependency management. While GitLab supports the software devlopmet life cycle on the level of collaboration and automatisation, Poetry supports the Python developer on a lower level: it helps the developer to setup and manage a Python project on his local computer.
Together, Poetry and GitLab are building up an excellent tool ensemble to implement large Python projects. This tutorial will show how to use both GitLab and Poetry and how a combination of these two tools can lead to an efficient Devop workflow.
Overview
The Poetry Project
In Poetry: Packaging and Dependency Management for Python, the installation, configuration and usage of Poetry was already explained in detail: in this tutorial, only the basic and necessary Poetry commands will be shown again.
Create a new Poetry based Python project (name “python-devop” which will create a new folder with that name):
poetry new python-devop
Change to the new created directoy “python-devop” and you will see a directory structure like this:
├── pyproject.toml
├── python_devop
│   └── __init__.py
├── README.rst
└── tests
    ├── __init__.py
    └── test_python_devop.py
The file pyproject.toml holds the metadata of your project. Beside dependencies to other packages, a project description etc., this file contains a versioning number for your project:
[tool.poetry]
...
version = "0.1.0"
When later publishing your project via GitLab / CI, it is very important to increase the versioning number before every commit. If you not change the version in your current commit, the package build itself will work, but due to version number conflicts, it can not be pushed to GitLabs package registry.
Writing code …
Now its time to write some code! For this tutorial, we just add a Python module “helloworld.py” to the sub folder “python_devop” with two easy functions:
#!/usr/bin/env/python

def sayHello():
    return "Hello world!"

def add (a,b):
    return a + b
… testing the code
In this tutorial, only the first and basic steps of testing can be shown. For a more detailed overview of Pythons testing capabilities, see Unit testing framework.
Poetry makes testing your code easy. In the “tests” sub folder, add a file “test_python_devop.py” with the following content:
import unittest
import python_devop.helloworld

class TestStringMethods(unittest.TestCase):

    def test_add(self):
        theSum = python_devop.helloworld.add(2,3)
        self.assertEqual(theSum, 5, "Sum should be five ...")

    def test_sayHello(self):
        greetings = python_devop.helloworld.sayHello()
        self.assertEqual(greetings, "Hello world!" , "Greetings should be: Hello world!")

if __name__ == '__main__':
    unittest.main()
Now, activate the current virtual environment via
poetry shell
From the root folder of your project, install the package:
poetry install
After that, you can execute your tests from within the “tests” subfolder:
python3 -m unittest -v
If the tests were successfull, you should see an output similar to this:
test_add (test_python_devop.TestStringMethods) ... ok
test_sayHello (test_python_devop.TestStringMethods) ... ok

----------------------------------------------------------------------
Ran 2 tests in 0.000s

OK
If you see a “FAILED” statement instead of “OK” in the last line, something went wrong in your code and / or tests. Check both again and correct them if necessary.
Now, everything is set up on the local side. We can now go on and couple the Poetry project with GitLab.
The GitLab Repository
After your code works and the tests were running successfully on your local machine, it is time to create a GitLab project and upload (”push”) your Poetry into it.
Log in to GitLab and create a new project. You can use the “Blank project” template: just give the project a name (”python-devop”) and if necessary, change the permissions (”Private / Internal / Public”).
You will now be redirected to the start page of your new, still empty repository. Here, you can find some instructions how to fill the repository. As you have already your Poetry project on your local computer, follow the steps under “Push an existing folder” inside your Poetry project:
cd existing_folder
git init --initial-branch=main
git remote add origin git@gitlab.mpcdf.mpg.de:YOURUSERNAME/NAMEOFYOURREPO.git
git add .
git commit -m "Initial commit"
git push -u origin main
If you are using an old version of Git, the option “–inital-branch” does not exist. In this case, just executes these two commands instead of the “git init” command from above:
git init
git symbolic-ref HEAD refs/heads/main
In the GitLab web interface, you should see now the files and directories of your Poetry project (press “F5” (reload) in your browser).
Congratulations - you have now a working Python project, ingested initially into a GitLab repository.
The CI pipeline
With GitLab’s Continous Integration, it is possible to automate parts of a project’s workflow. These automatizations are organized in CI Pipelines which you can find in GitLab’s menu on the left under the menu point “CI/CD”. In this tutorial, we will
automate the tests you have already written in the chapter before
build a Python package out of the Poetry project
deploy this package to GitLab’s internal package registry
All of these steps will be executed automatically on the GitLab server if a new commit was done. All you need to do is to create a new file called .gitlab-ci.yml (don’t forget the dot!) in the root folder of your Poetry project. In the file .gitlab-ci.yml we can now define so called stages which are automatically executed on GitLab runners after every push to GitLab (in the GitLab documentation, you will find much more information about Continous Integration & Co.)
But lets add some content to the file .gitlab-ci.yml:
default:
  image: python:3.9
At first, we need to define a Docker image which should be used as basis for a container to execute the CI Pipeline. GitLab will automatically clone the Git repository into the running Docker container, so all files of your Poetry project are available inside the container. As we created a Python project within Poetry, we will use the Python image in version 3.9 from DockerHub.
As a next step, we need to prepare our Python/Poetry environment inside the Docker container. This has to be done before any of the later defined stages are executed, so we put it into a section before_script. The three lines will install Poetry, then use Poetry itself to install our project and last not least, activate our virtual environment. You will recognize the code:
before_script:
  - pip install poetry
  - poetry install
  - source `poetry env info --path`/bin/activate
Now, we have everything to execute Poetry functionality and we can start to define stages which are doing something within our CI pipeline:
stages:
  - test
  - build
We are defining two stages - one for the tests we defined already and a second one build for building and deploying the project. This second one will also do the deployment into the GitLab package registry, because it makes no sense to define an extra stage here. Every job in a CI pipeline get its own instance of a Docker container, executed one after the other. This means in a possible third stage for deployment, the build process needs to be done again, so to make life easier, we are combining these two steps already in the build stage.
After defining the stages, we can now define jobs inside the stages. First, start with a job for executing the unit tests:
testing:
  stage: test
  script:
    - echo "This is the test stage"
    - cd tests
    - python3 -m unittest -v
    - pytest --junitxml=report.xml
  artifacts:
    when: always
    reports:
      junit: /builds/USERNAME/python-devop/tests/report.xml
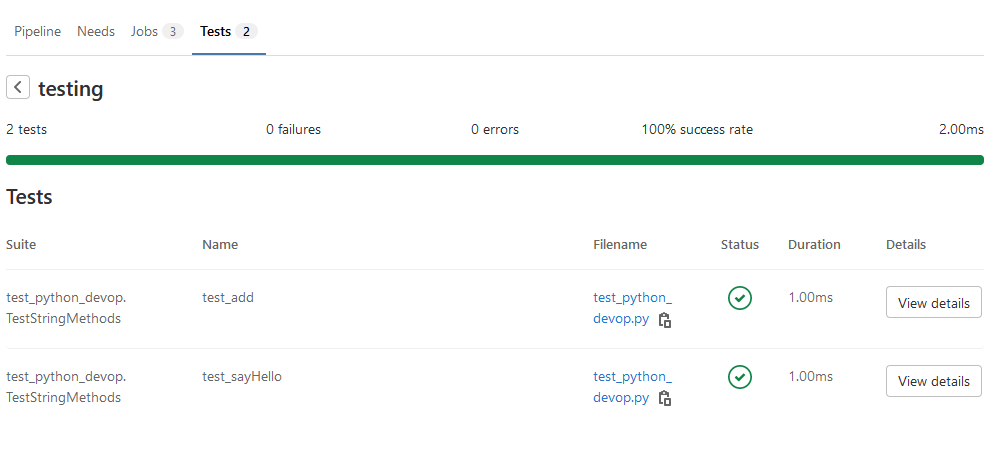
The job testing belongs to the stage test and executes a script. The commands in here should be well known from the testing phase in the previous chapter. The parameter –junitxml defines an XML file for the output of the tests. In the artifacts section, this file is used by GitLab to produce a nice graphical report which can be found in the pipeline overview under Tests (don’t forget to change your GitLab username here):
Lets go on to the second job building which belongs to the build stage:
building:
  stage: build
  needs: [testing]
  script:
    - echo "This is the build stage"
    - poetry config repositories.gitlab https://gitlab.mpcdf.mpg.de/api/v4/projects/6373/packages/pypi
    - echo "Repository gitlab configured ..."
    - poetry build
    - echo "Build done ..."
    - poetry publish --repository gitlab -u YOURUSERNAME -p YOURTOKEN
    - echo "Publishing done!"
Here we have another option needs: it refers to the testing job and means, that the building job will only be executed if the testing job was successfull. Then we have again some Poetry commands, lets have a deeper look at them:
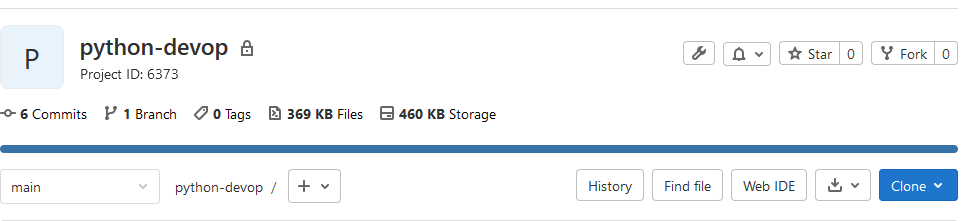
poetry config repositories.gitlab https://gitlab.mpcdf.mpg.de/api/v4/projects/XXX/packages/pypi
This Poetry command defines a new private package repository under the short name “gitlab”. In the URL, you need to change the three XXXs with the project id of your GitLab project - you can find this id on the start page of your repository:
Next, we are building the whole project:
poetry build
And - last not least - publish the outcome of the build process as PyPi package into GitLab:
poetry publish --repository gitlab -u YOURUSERNAME -p YOURTOKEN
Don’t forget to change two things in this command:
YOURUSERNAME: your GitLab user name
YOURTOKEN: In GitLab, you can create so called Access Tokens which can be used as kind of credentials for scripts and other tools. You can create them in your account under the menu “Access Tokens”. The one which you need for publishing to the GitLab package registry needs GitLAB API access.
Thats it - after you have saved the file .gitlab-ci.yml, you can now push your project again into GitLab (don’t forget add and commit commands before pushing). The CI pipeline will run automatcially, at first the tetsing job and then the building job will be executed. If everything worked well, you can take a look at the deatiled overview page of the pipeline:

Here you can also see if something went wrong, a click on the jobs opens their console output.
Take a look at the Package Registry, you should see your package here now:
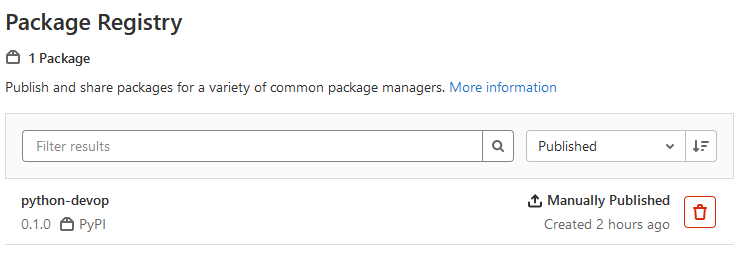
You can see that the package carries the version number you entered at the beginning into the Poetry config file. So if you did some changes to your project and the whole pipeline should run again, you need to change (increase) the version number. If you forget this, the CI process can’t publish into the pacakage registry and your building job will fail.
If you want to avoid giving your project permamently new version numbers, you can create another “developer” branch. Here, you can for example just execute the testing but not the building job, or you just get rid of Poetry’s publishng command.
Using the published package
If you want to use the new created package now on other computers or virtual environments, GitLab shows you how to do so. Just click on the package in the Package Registry:
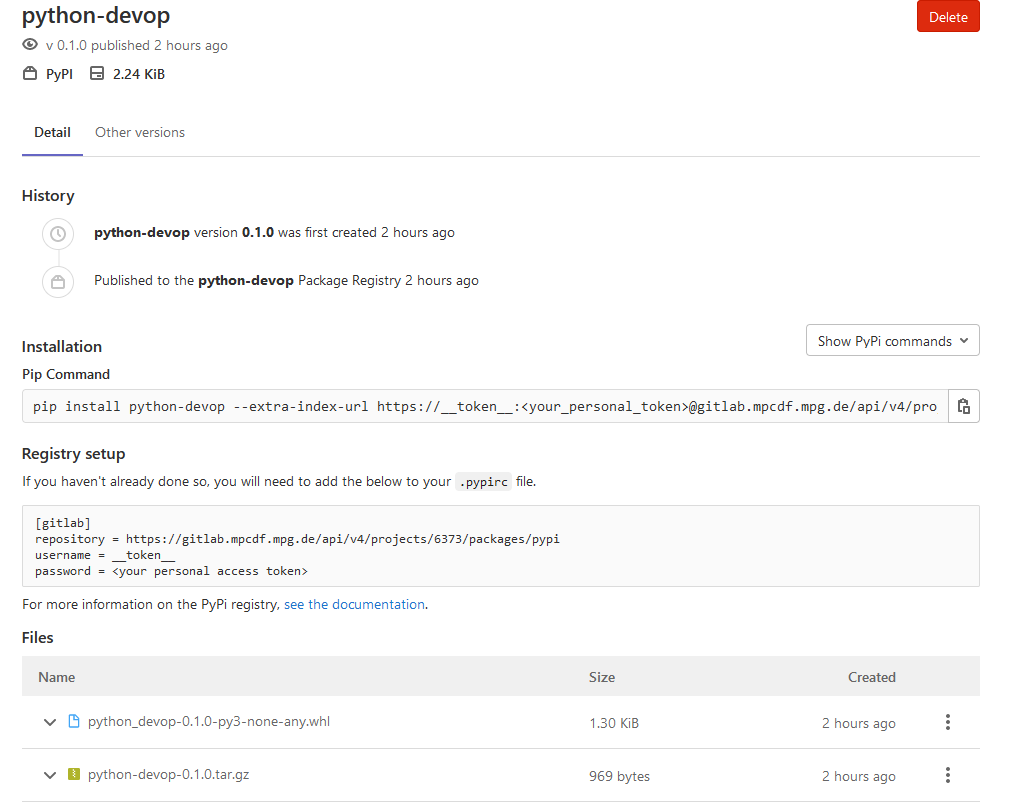
The first thing a new user needs to do is to setup GitLab in his local environment as new package registry. After you have configured your pip command to access GitLab’s package registry instead of the “official” PyPi repository, you can use the “Pip command” shown in the page to install the package. Don’t forget that you also need an access token here.